
- とりあえずReactにTailwind CSSを導入したい
- cyan、greenなどの色の追加方法がわからない
CSSフレームワークといえば、BootstrapやMATERIAL-UIなどが有名ですが、誰が作っても同じようなデザインになることから敬遠する方も多いですよね。
今回は流行りのTailwind CSSをcreate-react-appで作成したReact環境に導入してみたいと思います。
Tailwind CSSはUtility-FirstなCSSライブラリと紹介されることが多いです。
Tailwind CSSにはBootstrapのようなボタンクラスなどはなく、cssの各プロパティとその設定値に1対1で対応したクラスが事前に用意されているイメージです。
そのため、CSSの知識が無いと利用しづらいですが、逆にTailwind CSSを利用することでCSSの勉強を同時に行うことも可能です。
これまで、ReactにCSSを導入する方法としては、
- 各コンポーネントにstyleを直接コーディングする方法
- MATERIAL-UIやBootstrapといったCSSフレームワークを利用する方法
- styled components のようなCSS in JSと呼ばれる方法
などを一通り試してきました。
今回、Tailwind CSSを利用してみて、React以外のプロジェクトでも関係なく利用できる技術になるため、覚えて損はないはないかなと感じています。
この記事では、Tailwind CSSをcreate-react-appで作成したReact環境に導入する方法、そして、デフォルト設定では利用できない色の拡張方法などを紹介していきます。
create-react-appでReactのプロジェクトを作成
デフォルト設定でcreate-react-appコマンドで作成しても問題ないのですが、ここでは次のオプションを指定して作成します。
- Type Scriptを利用する
- yarnではなくnpmを利用する
- プロジェクト名をappとする
create-react-appをグローバルインストール
まずは、以下のコマンドを実行しcreate-react-appコマンドを利用できるようにしましょう。
既に、実行されている場合はこの作業は不要です。
npm install -g create-react-appこれで、create-react-appコマンドを利用してReactプロジェクトを作成できるようになります。
Reactプロジェクトを作成する
create-react-appコマンドを実行し、TypeScript、パッケージマネージャにnpmを利用するように指定します。
npx create-react-app app --template typescript --use-npmカレントディレクトリに「app」ディレクトリや「package.json」が作成されていれば成功です。
Tailwind CSSのインストール
create-react-appで作成した「app」プロジェクトに以下のコマンドを実行しTailwind CSSを導入します。
cd app

npm install -D tailwindcss@npm:@tailwindcss/postcss7-compat @tailwindcss/postcss7-compat postcss@^7 autoprefixer@^9
注意点としては、postcssとautoprefixerにそれぞれ少し古いバージョンをしている点です。
2021-04-25時点のTailwind CSSのバージョン2.1の場合は、上記のコマンドをそのままコピペで問題ないですが、インストール時は公式ページでインストール対象のTailwind CSS対応するpostcssとautoprefixerのバージョンを確認しましょう。
CRACOのインストールと設定
create-react-appで作成したプロジェクトはbabelやwebpackの設定を直接編集することができないため追加の設定などを行う際に不便になっています。
Tailwind CSSを利用する際もプラグインとして追加する必要があります。
対処方法として、公式ページにも紹介されているcracoというパッケージを利用することでプラグインの追加を行うことにします。
cracoは「Create React App Configuration Override」の略で今回の場合は、「postcss」のプラグインの設定に利用しています。
CRACOのインストール
cracoのインストールは以下のコマンドを実行するのみです。
npm install @craco/cracoCRACOの設定
cracoをインストールすると「craco」コマンドを利用することができるようになります。
通常のcreate-react-appでは作成したプロジェクトでは、「react-scripts」コマンドでstartやbuildを実行していましたが、この「react-scripts」の代わりに「craco」コマンドを利用することで追加したプラグインの設定などを有効にすることができます。
「craco」が「react-scprits」をラッピングしているイメージです。
それでは、cracoを利用するためにいくつか設定を行っていきます。
packeage.jsonの編集
create-react-appで作成されたpackage.jsonは以下のように「react-scripts」コマンドが設定された状態となっています。
{
  "scripts": {
    "start": "react-scripts start",
    "build": "react-scripts build",
    "test": "react-scripts test",
    "eject": "react-scripts eject"
  },
}
start、build、testの「react-scripts」の部分を「craco」に置き換えましょう。
置き換え後のpackage.jsonは次のようになります。
{
  "scripts": {
    "start": "craco start",
    "build": "craco build",
    "test": "craco test",
    "eject": "react-scripts eject"
  },
}
これで、「npm start」でcracoコマンドが実行されるようになりました。
craco.config.jsの作成
Tailwind CSSではtailwindcssとautoprefixerをプラグインとして追加設定する必要があります。
cracoコマンドで実行する際にtailwindcssとautoprefixerを読み込むようにするためには、「craco.config.js」というファイルを作成して設定をするだけです。
package.jsonファイルと同じ階層に「craco.config.js」ファイルを作成し、以下の内容に記載しましょう。
module.exports = {
  style: {
    postcss: {
      plugins: [
        require('tailwindcss'),
        require('autoprefixer'),
      ],
    },
  },
}
これで、cracoコマンド実行時にtailwindcssやautoprefixerが実行されるようになるため、「npm start」コマンド実行時にtailwindcssに追加したクラスなどが自動的に反映されるようになります。
Tailwind CSSの設定
cracoで実行環境が整いましたので、Tailwind CSSの設定を行っていきます。
Tailwind CSSの設定は「tailwind.config.js」ファイルにまとめて設定していきます。
tailwind.config.jsの作成
「tailwind.config.js」ファイルはtailwindcssに初期設定用のコマンドが用意されているので、そちらを利用して作成していきます。
次のコマンドを実行してみましょう。
npx tailwindcss initpackage.jsonと同じ階層に「tailwind.config.js」ファイルが作成されたはずです。
そして、ファイルの中身は次のようになっていますね。
module.exports = {
  purge: [],
  darkMode: false, // or 'media' or 'class'
  theme: {
    extend: {},
  },
  variants: {
    extend: {},
  },
  plugins: [],
}
このままでは、何も設定されていないため、最低限 create-react-appコマンドで作成したプロジェクトが動作するように設定する必要があります。
tailwind.config.jsを編集する
今回はTypeScriptを使用していますので、js / jsx / ts / tsxファイルを指定する必要があります。
対象とするファイルパターンはpurgeに追加していきます。
編集後のファイルは次のようになります。
create-react-appで作成されたプロジェクトの場合は、そのままコピペで大丈夫です。
module.exports = {
  purge: ['./src/**/*.{js,jsx,ts,tsx}', './public/index.html'],
  darkMode: false, // or 'media' or 'class'
  theme: {
    extend: {},
  },
  variants: {
    extend: {},
  },
  plugins: [],
}
index.cssを修正する
create-react-appで作成したプロジェクトに「index.css」ファイルが既に存在していますので、このファイルを中身をTailwind CSS用に編集します。
以下の通り、編集することでTailwind CSSのクラスが利用できるようになります。
@tailwind base;
@tailwind components;
@tailwind utilities;
index.tsxでindex.cssを読み込むようにする
create-react-appで作成したプロジェクトにはindex.tsxが一番上位のコンポーネントとして存在していますので、index.tsxでimportすることで、全てのコンポーネントでTailwind CSSを利用できるようになります。
以下のようにindex.cssをimport 文で追加します。
import React from 'react';
import ReactDOM from 'react-dom';
import App from './App';
import reportWebVitals from './reportWebVitals';
import './index.css'; // 追加
Tailwind CSSのテーマを拡張する
Tailwind CSSは「tailwind.config.js」を編集することで拡張することができます。
例えば、利用できる色はデフォルトでは、以下の8色を10段階の明るさ設定されたものが利用可能となっています。
- Gray
- Red
- Yellow
- Green
- Blue
- Indigo
- Purple
- Pink
Tailwind CSSには追加で設定することで、cyanなど全21色を利用することができます。
tailwind.config.jsに色を追加する
全ての色を追加したい場合は、以下の通り設定しましょう。
const colors = require('tailwindcss/colors')

module.exports = {
  purge: ['./src/**/*.{js,jsx,ts,tsx}', './public/index.html'],
  darkMode: false, // or 'media' or 'class'
  theme: {
    extend: {
      colors: {
        blueGray: colors.blueGray,
        coolGray: colors.coolGray,
        gray: colors.gray,
        trueGray: colors.trueGray,
        warmGray: colors.warmGray,
        red: colors.red,
        orange: colors.orange,
        amber: colors.amber,
        yellow: colors.yellow,
        lime: colors.lime,
        green: colors.green,
        emerald: colors.emerald,
        teal: colors.teal,
        cyan: colors.cyan,
        lightBlue: colors.lightBlue,
        indigo: colors.indigo,
        violet: colors.violet,
        purple: colors.purple,
        fuchsia: colors.fuchsia,
        pink: colors.pink,
        rose: colors.rose,
      }
    },
  },
  variants: {
    extend: {},
  },
  plugins: [],
}
これで、cyanなどの色を「bg-cyan-400」などのクラス名で利用できるようになります。
デフォルトと色合いが異なる色もある
greenはデフォルト設定から利用できるのですが、拡張設定で指定したgreenとは色合いが異なっています。
これは、デフォルト設定のgreenはemeraldが指定されているためです。
green

emerald

Tailwind CSSを利用してデザインする
Tailwind CSSを利用できる状態になったので、早速利用してみましょう。
サンプルでは、以下のクラスを利用してFlexBoxや背景色、サイズ指定などを実装してみました。
- flex
- justify-items-center
- flex-wrap
- bg-色-明るさ
- p-○
- m-○
- h-○
- w-○
- rounded-○
- text-○
App.tsx
create-react-appで初期構築されるApp.tsxに以下のように設定してみます。
import React from 'react';
export const App: React.FC = () => {
return (
<div className="flex justify-items-center flex-wrap p-4 bg-green-200">
<div className="flex justify-center items-center m-4 bg-green-400 h-80 w-80 rounded-lg text-9xl">1</div>
<div className="flex justify-center items-center m-4 bg-green-400 h-80 w-80 rounded-lg text-9xl">2</div>
<div className="flex justify-center items-center m-4 bg-green-400 h-80 w-80 rounded-lg text-9xl">3</div>
<div className="flex justify-center items-center m-4 bg-green-400 h-80 w-80 rounded-lg text-9xl">4</div>
<div className="flex justify-center items-center m-4 bg-green-400 h-80 w-80 rounded-lg text-9xl">5</div>
<div className="flex justify-center items-center m-4 bg-green-400 h-80 w-80 rounded-lg text-9xl">6</div>
<div className="flex justify-center items-center m-4 bg-green-400 h-80 w-80 rounded-lg text-9xl">7</div>
<div className="flex justify-center items-center m-4 bg-green-400 h-80 w-80 rounded-lg text-9xl">8</div>
<div className="flex justify-center items-center m-4 bg-green-400 h-80 w-80 rounded-lg text-9xl">9</div>
<div className="flex justify-center items-center m-4 bg-green-400 h-80 w-80 rounded-lg text-9xl">10</div>
</div>
);
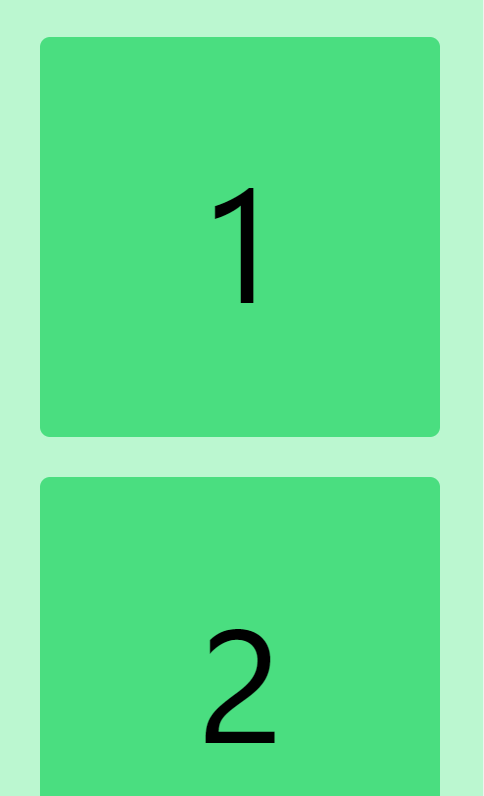
}サンプルの実行結果
実行方法はpackage.jsonに設定しているstartコマンドを実行するのみです。
npm startブラウザで以下のアドレスにアクセスします。

PC相当の横幅で表示した場合
ブラウザの横幅をPC相当にした場合はこのように表示されるはずです。

スマホ相当の横幅で表示した場合
ちゃんとFlexBoxが有効になっていることが確認できます。
まとめ
今回はTailwind CSSをcreate-react-appへの導入する手順と色の拡張方法のみをご紹介しましたが、Tailwind CSSは実際にコーディングで利用してみることで、余計な機能がないシンプルな設計であることがわかってくると思います。
また、導入方法で特に難しいところもなく、適用先のフレームワークを選ばないため学習メリットも高いですね。
特にBootstrapのようなCSSフレームワークを敬遠してきた方は一度試してみてはいかがでしょうか。